School Admin Guide
1. Brief Platform Overview
Access the Portal
Use the credentials shared with you in the "Your Litguide Invite" email and log into the hub at hub.litguide.ca
If your board has Google SSO available, please click the Google Sign-In button. (Check with your board representative for confirmation.
Dashboard
Great! You will now see the first tab, the Dashboard tab, where you can view all your school's data at a glance. You will be able to see the following:
- Shortcut To Your Students
- Go to Your Classrooms
- Total Classrooms in Your School
- Total Enrolled Students
- Total Enrolled Teachers
- Total Seats Purchased by Board
2. Getting Started
1. Creating a Classroom
As mentioned before, one of the main responsibilities of a school admin is to create classrooms each semester.
To get started, go to the Classrooms tab and click 'New Classroom'.
1.1 Enter Classroom Details
Fill The 4 Fields Below:
- Choose the current semester for your classroom (e.g., Fall 2025).
- Enter a clear and unique name for your classroom (e.g., “Grade 10 English – Period 2”).
This name will help you and your students identify the class. - Create a unique classroom code, ideally the course code (e.g., END2D). Teachers share this code with students for registration. Avoid dashes or special characters.
- Enter an approximate number of students expected in your classroom. Note: This is for reference only and won’t affect your code, even if student numbers exceed your estimate.
After your done click 'Save & Close' and your classroom will be created! ✔
2. Assigning and Creating Teacher Profiles
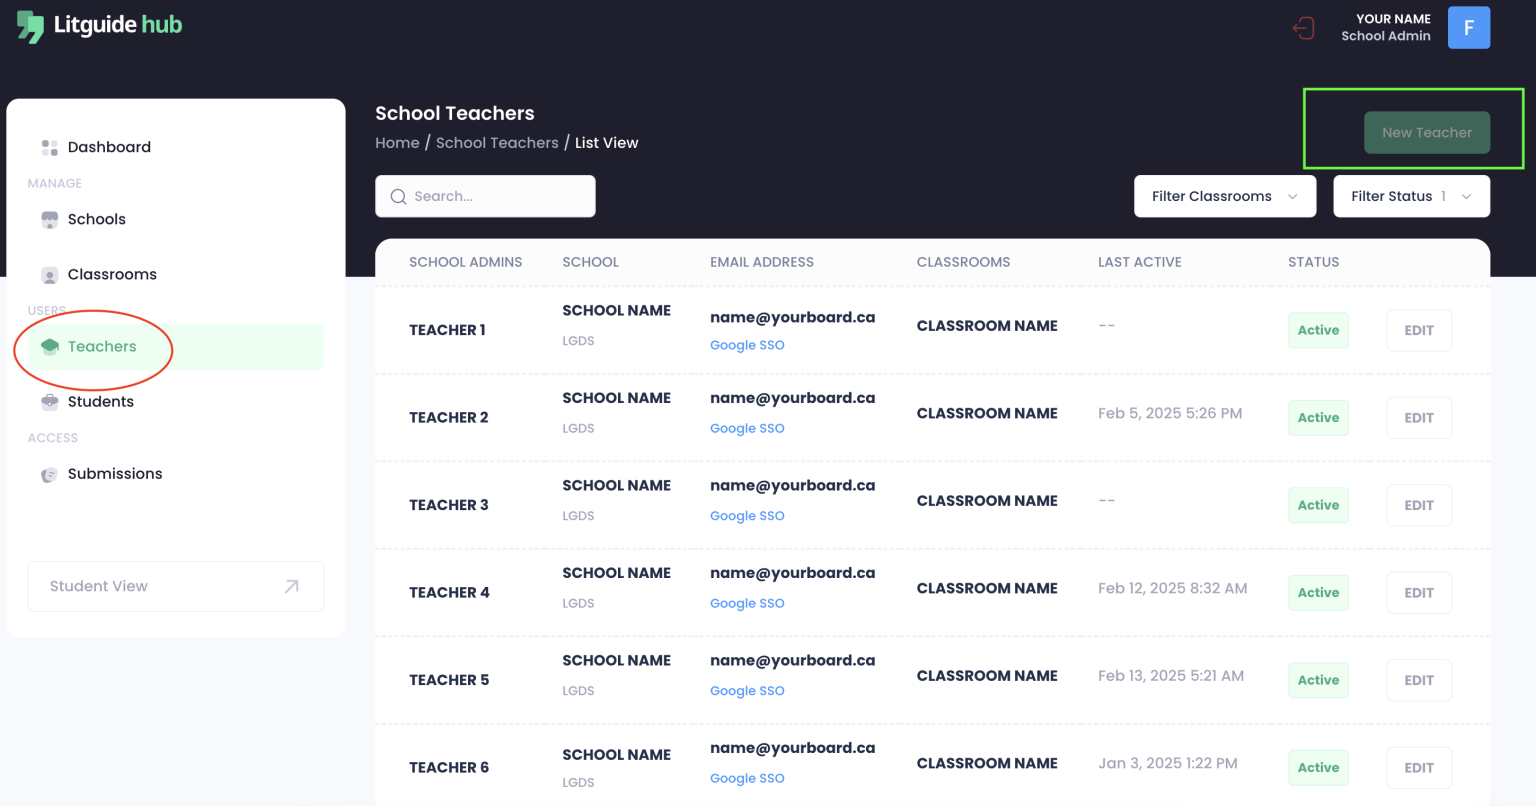
Now that the classroom is set up, the next step is to create or assign a teacher. Go to the Teachers tab and click 'New Teacher'
2.2 Enter Teacher Details
Fill The 4 Fields Below:
- Select the classroom(s) where you want to assign this teacher.
- Please enter the teacher’s first and last name in the corresponding fields.
- Enter the teacher’s board email to send their invite with the classroom setup. Teachers must distribute redeem codes from the Classroom Creation tab to students.
Your teacher will be assigned to the classroom. Once you’re done, click ‘Save & Close’ to create your classroom! ✔
2.3 Teacher Invite
After adding the teacher, they will receive a classroom invite at the email address you entered. The invite will look like the example below.
The teacher must sign up and create a password. They can access the Hub and set their password directly from the link in the email. Invites are valid for 30 minutes—if the invite expires, they can click 'Resend Link' to generate a new one. No further action is required on your end.3. Important Points to Note
Additional Support
Feel free to contact us regarding any questions or concerns.


